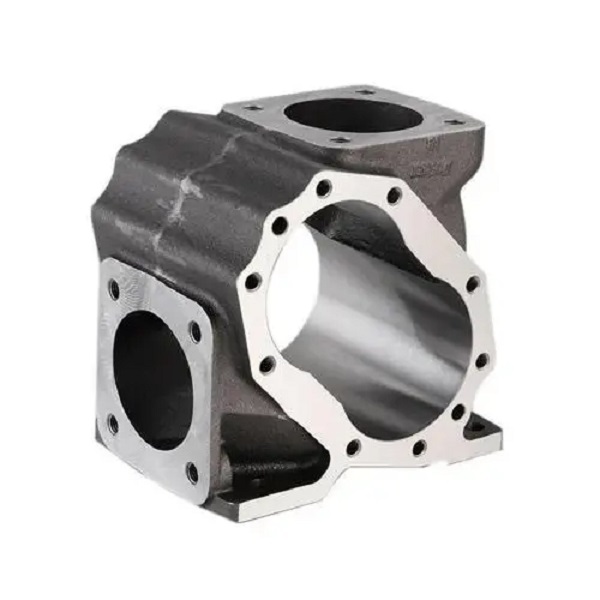
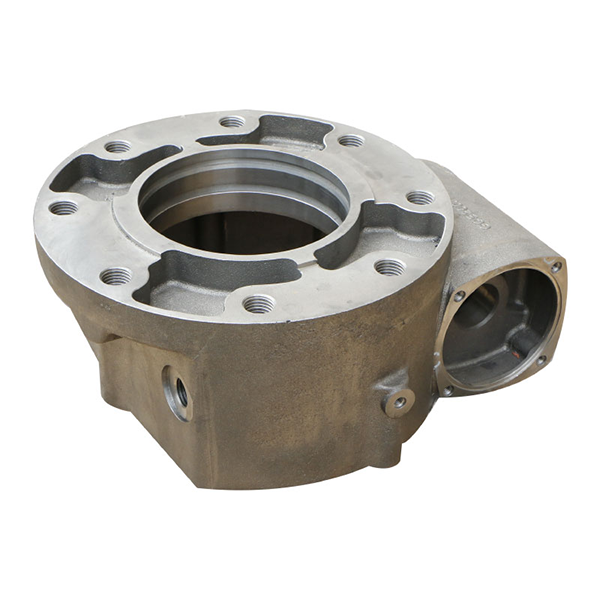
EN-GJS-600-3 represents a high-strength ductile iron material that delivers exceptional performance in demanding industrial applications. Understanding EN-GJS-600-3 chemical composition, EN-GJS-600-3 equivalent grades, and EN-GJS-600-3 material properties enables engineers to optimize component design and achieve superior results. This spheroidal graphite cast iron combines superior mechanical properties with excellent casting versatility, making it the preferred choice for power transmission components, heavy machinery parts, and high-pressure systems.
Industry professionals value EN-GJS-600-3 for several compelling reasons:
- High tensile strength of 600 MPa ensures reliable load-bearing capacity in critical applications.
- Superior wear resistance extends component lifespan and reduces maintenance costs.
- Excellent vibration damping properties reduce noise and protect adjacent components.
- Cost-effective manufacturing through near-net-shape casting minimizes material waste.
- Proven reliability in harsh operating environments including extreme temperatures and heavy loads.
Engineers who understand the chemical composition, material properties, and equivalent grades of EN-GJS-600-3 can optimize component design and achieve superior performance outcomes.
Key Takeaways
- EN-GJS-600-3 delivers minimum 600 MPa tensile strength with excellent ductility for demanding applications.
- The precisely controlled chemical composition creates spheroidal graphite structure for optimal mechanical properties.
- International equivalent grades include GGG-60 (Germany), ISO 1083/JS/600-3, and ASTM A536 Grade 80-55-06 (USA).
- Mechanical properties vary with section thickness, requiring careful consideration during component design.
- Predominantly pearlitic microstructure (>65%) provides exceptional wear resistance and strength characteristics.
- Applications include crankshafts, gears, hydraulic cylinders, high-pressure valves, and heavy-duty machinery components.
- Professional ductile iron casting foundries with ISO/IATF 16949 certification ensure consistent quality and performance.
- Heat treatment processes can significantly enhance material properties for specialized applications.
What Is EN-GJS-600-3?

Material Classification
EN-GJS-600-3 follows the European standard designation system for ductile cast iron materials. The nomenclature breaks down into specific technical indicators that define the material’s characteristics. “EN” signifies European Norm standardization, ensuring consistent specifications across European manufacturing. “GJS” identifies the material as ductile iron with spheroidal (nodular) graphite structure. The number “600” indicates minimum tensile strength of 600 megapascals. The final digit “3” specifies minimum elongation percentage of 3%.
This designation system helps engineers and procurement specialists quickly identify material properties without consulting detailed specification sheets. The standardized naming convention eliminates confusion when sourcing materials across international borders. Manufacturers can reference the same material properties regardless of location or supplier.
Note: The spheroidal graphite structure distinguishes EN-GJS-600-3 from gray cast iron, where graphite appears in flake form. This microstructural difference dramatically improves mechanical properties.
Microstructure Characteristics
The unique performance of EN-GJS-600-3 stems from its carefully controlled microstructure. During solidification, magnesium treatment transforms graphite from flakes into spherical nodules. These nodules distribute evenly throughout the iron matrix, creating a structure that combines strength with ductility. The matrix surrounding the graphite nodules consists predominantly of pearlite, providing high hardness and wear resistance.
| Microstructure Component | Typical Content | Contribution to Properties | 
|---|---|---|
| Spheroidal Graphite | 10-12% by volume | Ductility, machinability, damping | 
| Pearlite | >65% | Strength, hardness, wear resistance | 
| Ferrite | <35% | Toughness, impact resistance | 
| Nodule Count | 100-300 per mm² | Mechanical property consistency | 
The spheroidal graphite acts as stress concentrators with rounded geometry, preventing crack initiation far more effectively than flake graphite. This microstructure enables the material to absorb impact energy and resist sudden failure. The predominantly pearlitic matrix delivers mechanical strength approaching that of medium-carbon steels while maintaining the casting advantages of iron.
Key Performance Attributes
EN-GJS-600-3 excels in applications requiring specific performance characteristics. The material demonstrates exceptional wear resistance due to its hard pearlitic matrix and self-lubricating graphite nodules. Components manufactured from this grade withstand sliding wear, abrasive wear, and surface fatigue better than many alternative materials.
Vibration damping capacity represents another critical advantage. The graphite nodules effectively absorb mechanical vibrations, providing damping characteristics approximately 10 times superior to steel. This property protects sensitive equipment and reduces noise in operating machinery. Machine bases, pump housings, and gear casings benefit significantly from this inherent damping capacity.
Tip: When selecting materials for high-vibration environments, consider EN-GJS-600-3 to reduce noise transmission and protect adjacent components from vibration-induced fatigue.
EN-GJS-600-3 Chemical Composition
Understanding EN-GJS-600-3 chemical composition provides insight into its performance characteristics and helps manufacturers control quality during production. The EN-GJS-600-3 chemical composition includes carefully balanced elements that contribute to its mechanical properties and casting behavior. Each element in the EN-GJS-600-3 chemical composition serves specific purposes in achieving desired mechanical properties.
Primary Alloying Elements
Carbon (C): 3.4% to 3.85%
Carbon content directly influences graphite formation and mechanical properties. The relatively high carbon concentration enables excellent casting fluidity, allowing complex shapes to fill completely. During solidification, carbon precipitates as spheroidal graphite nodules when properly treated with nodulizing agents. The carbon range must be carefully controlled during melting operations. Excessive carbon can create processing difficulties, while insufficient carbon results in carbide formation that reduces ductility.
Silicon (Si): 2.3% to 3.1%
Silicon acts as the primary graphitizing element in ductile iron production. Higher silicon content promotes ferrite formation in the matrix and encourages graphite precipitation rather than carbide formation. Silicon improves casting fluidity and reduces shrinkage during solidification. The silicon range balances these beneficial effects against potential brittleness at very high concentrations. Modern foundries optimize silicon content based on section thickness and desired mechanical properties.
Manganese (Mn): 0.1% to 0.3%
Manganese contributes to pearlite formation in the matrix structure. This element stabilizes carbides during cooling and helps achieve the desired pearlite content exceeding 65%. The controlled manganese addition strengthens the material without excessive hardening. Too much manganese can promote carbide formation and reduce ductility, so the range remains tightly controlled.
Impurity Elements
Sulfur (S): Less than 0.02%
Sulfur represents one of the most critical elements requiring strict control in ductile iron production. Sulfur prevents spheroidal graphite formation by interfering with magnesium nodulization. Foundries must reduce sulfur content through desulfurization treatments before adding nodulizing agents. Modern production facilities achieve sulfur levels below 0.015% through careful raw material selection and desulfurization processes.
Phosphorus (P): Less than 0.1%
Phosphorus creates brittleness in ductile iron castings by forming hard, brittle phosphide compounds. These compounds concentrate at grain boundaries and reduce impact resistance. The phosphorus limit prevents formation of these detrimental phases. Raw material selection focuses on low-phosphorus sources to maintain control within specifications.
Nodulizing Elements
Magnesium (Mg): 0.02% to 0.04%
Magnesium serves as the essential nodulizing agent that transforms graphite shape from flakes to spheres. The element must be added in precise quantities during molten metal treatment. Too little magnesium results in incomplete nodulization with mixed graphite forms. Excessive magnesium creates processing problems including violent reactions and slag formation. The residual magnesium content in the final casting indicates successful treatment.
Rare Earth Elements (RE): 0.03% to 0.05%
Rare earth elements assist magnesium in achieving spheroidal graphite formation and improve nodule count. These elements refine nodule size distribution and enhance overall material quality. Rare earths help counter the negative effects of certain tramp elements that can interfere with nodulization. The combination of magnesium and rare earths produces superior graphite morphology compared to magnesium alone.
Note: Chemical composition serves as a production control parameter rather than an acceptance criterion. Mechanical properties determine casting acceptance, though EN-GJS-600-3 chemical composition analysis guides process control throughout manufacturing.
| Element | Specified Range | Primary Function | 
|---|---|---|
| Carbon (C) | 3.4-3.85% | Graphite formation, fluidity | 
| Silicon (Si) | 2.3-3.1% | Graphitization, matrix control | 
| Manganese (Mn) | 0.1-0.3% | Pearlite formation, strength | 
| Sulfur (S) | <0.02% | Must be minimized for nodulization | 
| Phosphorus (P) | <0.1% | Must be controlled to prevent brittleness | 
| Magnesium (Mg) | 0.02-0.04% | Spheroidal graphite formation | 
| Rare Earths (RE) | 0.03-0.05% | Nodule refinement, quality enhancement | 
EN-GJS-600-3 Equivalent Materials
Engineers frequently need to cross-reference EN-GJS-600-3 equivalent materials across different international standards. Understanding EN-GJS-600-3 equivalent grades facilitates global sourcing and ensures material compatibility in multinational projects. Recognizing EN-GJS-600-3 equivalent designations helps engineers select appropriate materials regardless of specification origin.
German Standard Equivalent
GGG-60
The German DIN standard designates this material as GGG-60, where “GGG” stands for “Gusseisen mit Kugelgraphit” (spheroidal graphite cast iron). The number “60” represents minimum tensile strength expressed in kgf/mm², which converts directly to 600 MPa. German foundries have extensive experience producing this grade for automotive and industrial applications. The mechanical properties and microstructure match EN-GJS-600-3 specifications precisely.
German engineering documentation often references GGG-60 for components manufactured before European standard harmonization. Legacy drawings and specifications may require engineers to recognize this equivalence. Material certificates from German foundries typically include both designations to facilitate international trade.
ISO International Standard
ISO 1083/JS/600-3
The International Organization for Standardization publishes ISO 1083 as the global reference for spheroidal graphite cast irons. This standard uses the designation “JS/600-3” where “JS” indicates ductile iron with spheroidal graphite, “600” specifies tensile strength in MPa, and “3” denotes minimum elongation percentage. ISO 1083 harmonizes with EN 1563, making these essentially identical specifications.
International projects often specify materials according to ISO standards to ensure universal understanding. Foundries worldwide can produce to ISO 1083 specifications regardless of their local standards. The ISO designation eliminates regional naming variations and creates a common technical language.
American Standard Equivalent
ASTM A536 Grade 80-55-06
The American Society for Testing and Materials specifies ductile iron in ASTM A536. Grade 80-55-06 provides similar performance to EN-GJS-600-3, though not an exact equivalent. The designation uses ksi (thousands of pounds per square inch) units where “80” indicates 80 ksi tensile strength (approximately 552 MPa), “55” represents 55 ksi yield strength (379 MPa), and “06” specifies 6% minimum elongation.
The American grade offers slightly lower tensile strength but higher elongation compared to EN-GJS-600-3. Engineers substituting between these grades should verify that the American specification meets application requirements. Many international projects accept ASTM A536 Grade 80-55-06 as an acceptable alternative when European-standard material proves difficult to source.
British Standard Equivalent
BS 2789 Grade 600/3
British Standard BS 2789 classified this material as Grade 600/3 before European standard harmonization. The designation follows the same logic as the European standard with “600” indicating tensile strength and “3” representing elongation. Modern UK foundries primarily reference EN 1563, but older specifications may still cite BS 2789.
Tip: When reviewing historical British engineering drawings, verify whether specifications reference BS 2789 or the current European standard EN 1563.
Japanese Standard Equivalent
FCD600
Japanese Industrial Standards classify equivalent ductile iron as FCD600 under JIS G 5502. “FCD” abbreviates “Ferritic-Pearlitic Cast iron with spheroidal graphite,” and “600” indicates minimum tensile strength in MPa. Japanese foundries produce this grade extensively for automotive components and industrial machinery.
The Japanese specification includes slightly different test requirements and temperature ranges compared to European standards. Engineers should review detailed specifications when substituting between Japanese and European grades. Material property variations typically remain within acceptable ranges for most applications.
Equivalent Grade Comparison
| Standard | Designation | Tensile Strength | Yield Strength | Elongation | 
|---|---|---|---|---|
| European (EN 1563) | EN-GJS-600-3 | ≥600 MPa | ≥370 MPa | ≥3% | 
| German (DIN) | GGG-60 | ≥600 MPa | ≥370 MPa | ≥3% | 
| International (ISO) | ISO 1083/JS/600-3 | ≥600 MPa | ≥370 MPa | ≥3% | 
| American (ASTM) | A536 Grade 80-60-03 | ≥552 MPa (80 ksi) | ≥414 MPa (60 ksi) | ≥3% | 
| British (BS) | BS 2789 Grade 600/3 | ≥600 MPa | ≥370 MPa | ≥3% | 
| Japanese (JIS) | FCD600 | ≥600 MPa | ≥370 MPa | ≥3% | 
Note: When substituting between standards, engineers should verify that all critical properties including section size effects, test methods, and heat treatment requirements align with application needs. Proper understanding of EN-GJS-600-3 equivalent grades ensures successful material substitution.
EN-GJS-600-3 Material Properties
Understanding EN-GJS-600-3 material properties determines its suitability for specific engineering applications. The comprehensive EN-GJS-600-3 material properties vary with section thickness due to cooling rate effects on microstructure development. Engineers must evaluate EN-GJS-600-3 material properties carefully when designing components with variable wall thickness.
Mechanical Properties by Section Thickness
Thin Sections (Thickness ≤ 30mm)
Components with wall thickness up to 30mm exhibit the highest mechanical properties due to rapid cooling rates. Fast cooling creates fine-grained pearlitic structures with superior strength and hardness. The minimum tensile strength reaches 600 MPa, providing excellent load-bearing capacity. Yield point minimum of 370 MPa ensures the material resists permanent deformation under service loads. Elongation of at least 3% provides adequate ductility for most applications.
Thin-section components benefit from maximum wear resistance and fatigue strength. Gears, connecting rods, and high-stress brackets typically utilize this section range. The fine microstructure supports high surface hardness after heat treatment if required.
Medium Sections (Thickness 30mm to 60mm)
As section thickness increases to the 30-60mm range, cooling rates decrease slightly. The resulting microstructure remains predominantly pearlitic but with somewhat coarser grain structure. Tensile strength maintains the 600 MPa minimum specification. Yield point reduces to 360 MPa minimum, reflecting the coarser pearlite spacing. Elongation decreases to 2% minimum as the section size increases.
Components in this thickness range still deliver excellent service performance for most applications. Pump housings, valve bodies, and moderate-duty shafts commonly utilize this section range. Engineers should account for the modest property reduction when designing components with variable wall thickness.
Heavy Sections (Thickness 60mm to 200mm)
Large castings with sections between 60mm and 200mm thick experience the slowest cooling rates. This extended solidification time allows more ferrite formation in the matrix, reducing overall strength. Minimum tensile strength decreases to 550 MPa for this thickness range. Yield point drops to 340 MPa minimum due to increased ferrite content. Elongation reduces to 1% minimum, reflecting the coarser microstructure.
Despite lower mechanical values, heavy sections still provide adequate strength for many applications. Large valve bodies, heavy-duty housings, and structural components utilize this section range. Engineers must carefully consider the reduced properties when designing thick-walled components or specify heat treatment to enhance properties.
| Section Thickness | Tensile Strength (Min) | Yield Point (Min) | Elongation (Min) | 
|---|---|---|---|
| t ≤ 30mm | ≥600 MPa | ≥370 MPa | ≥3% | 
| 30mm < t ≤ 60mm | ≥600 MPa | ≥360 MPa | ≥2% | 
| 60mm < t ≤ 200mm | ≥550 MPa | ≥340 MPa | ≥1% | 
Tip: Design components with uniform wall thickness when possible to maintain consistent mechanical properties throughout the casting.
Physical Properties
Density: 7.1 to 7.2 g/cm³
The material density remains relatively constant across different section sizes and microstructures. This density closely matches carbon steel, simplifying weight calculations for component design. The consistent density enables accurate mass predictions for production planning and shipping logistics.
Hardness: 210 to 260 HB (Brinell)
Typical hardness values reflect the predominantly pearlitic microstructure. Thinner sections generally exhibit higher hardness due to finer pearlite spacing. The hardness range provides good wear resistance while maintaining reasonable machinability. Heat treatment can increase hardness significantly for applications requiring enhanced wear resistance.
Elastic Modulus: 165 to 175 GPa
The modulus of elasticity indicates material stiffness under load. EN-GJS-600-3 exhibits moderate stiffness compared to steel (200-210 GPa). Engineers must account for this lower stiffness when calculating deflection in bending applications. The elastic modulus remains relatively constant across the material’s working temperature range.
Thermal Properties
Thermal Conductivity: 31 to 33 W/(m·K)
EN-GJS-600-3 conducts heat more effectively than most steels. This characteristic benefits applications involving thermal cycling or heat dissipation. Brake components, cylinder heads, and pump housings take advantage of enhanced thermal conductivity. The material effectively dissipates frictional heat and reduces local temperature concentrations.
Coefficient of Thermal Expansion: 10 to 12 × 10⁻⁶/K
The thermal expansion coefficient closely matches carbon steel values. This compatibility minimizes thermal stress when assembling ductile iron components with steel parts. The similar expansion rates prevent loosening or binding across temperature variations. Designers can use standard steel fasteners without special accommodation for differential expansion.
Tribological Characteristics
Wear Resistance
The combination of hard pearlitic matrix and spheroidal graphite creates excellent wear resistance. The graphite nodules act as solid lubricant reservoirs, reducing friction during sliding contact. Pearlite provides matrix hardness that resists abrasive wear. Components like gear teeth, cam surfaces, and wear plates benefit from these natural wear-resistant properties.
Applications involving metal-to-metal sliding contact show significantly lower wear rates compared to steel. The self-lubricating effect reduces the friction coefficient and minimizes heat generation. Extended service life results from the material’s inherent wear resistance.
Vibration Damping
Graphite nodules effectively absorb mechanical vibration energy through internal friction mechanisms. The damping capacity exceeds steel by approximately 10 times, making EN-GJS-600-3 ideal for reducing noise and vibration. Machine tool bases, gear housings, and pump casings utilize this property to protect sensitive equipment and reduce operational noise.
Note: The vibration damping capacity helps extend bearing life and reduce fatigue failure in adjacent components by absorbing shock loads and dynamic forces.
Machinability
EN-GJS-600-3 demonstrates good machinability using conventional cutting tools and parameters. The spheroidal graphite acts as chip breakers during cutting operations, producing short chips that evacuate easily. This characteristic reduces tool wear compared to continuous-chip materials like steel. Typical cutting speeds range from 60 to 120 meters per minute depending on operation and tooling.
Drilling, milling, turning, and threading operations proceed efficiently with carbide or high-speed steel tools. The material’s moderate hardness balances strength requirements with ease of finishing operations. Components can be machined to tight tolerances using standard manufacturing equipment.
Heat Treatment of EN-GJS-600-3
Heat treatment processes modify material properties to meet specific application requirements. The predominantly pearlitic microstructure responds well to various thermal treatments.
Stress Relief Annealing
Process: Heating to 500-550°C, holding for 1-2 hours per inch of section thickness, followed by slow furnace cooling.
Purpose: Relieves residual stresses from casting and machining operations without significantly changing mechanical properties or microstructure. This treatment improves dimensional stability and reduces distortion risk during service.
Applications: Large castings requiring precise dimensions, components subjected to vibration or thermal cycling, and parts requiring subsequent machining operations.
Normalization
Process: Heating to 880-920°C, holding at temperature to ensure thermal equilibrium, followed by air cooling.
Purpose: Refines grain structure, homogenizes the matrix, and produces uniform mechanical properties. Normalized material exhibits improved toughness with modestly reduced hardness compared to as-cast condition.
Applications: Components requiring enhanced impact resistance, castings with variable section thickness needing property uniformity, and parts subjected to dynamic loading.
Hardening and Tempering
Process: Austenitizing at 850-900°C, oil quenching, followed by tempering at 550-650°C.
Purpose: Creates tempered martensitic or bainitic microstructure with significantly enhanced strength. Yield strength can increase to 450-500 MPa or higher. Tempering temperature controls final hardness and toughness balance.
Applications: High-stress components like crankshafts and connecting rods, gears requiring high surface hardness, and parts subjected to heavy cyclic loading.
Surface Hardening Treatments
Induction Hardening: Selective surface heating using electromagnetic induction followed by rapid cooling. Surface hardness reaches 45-55 HRC while maintaining tough core. Ideal for gear teeth, bearing surfaces, and wear-prone areas.
Flame Hardening: Oxy-acetylene torch heating of surfaces followed by water quenching. Similar results to induction hardening but better suited for large or irregular surfaces.
Nitriding: Diffusion of nitrogen into surface layers at 500-580°C creates extremely hard nitride compounds. Surface hardness exceeds 60 HRC with excellent wear and fatigue resistance. Process takes 20-90 hours depending on case depth requirements.
| Heat Treatment | Temperature | Cooling Method | Hardness Effect | Primary Benefit | 
|---|---|---|---|---|
| Stress Relief | 500-550°C | Slow furnace cool | No change | Dimensional stability | 
| Normalization | 880-920°C | Air cool | Slight reduction | Uniform properties, toughness | 
| Hardening & Tempering | 850-900°C, then 550-650°C | Oil quench, then air cool | Significant increase | Maximum strength | 
| Induction Hardening | 900-950°C (surface) | Water quench | Surface 45-55 HRC | Wear resistance, tough core | 
| Nitriding | 500-580°C | Air cool (no quench) | Surface >60 HRC | Extreme wear resistance | 
Tip: Select heat treatment based on specific service requirements. Consult with foundry metallurgists to optimize thermal processing for critical applications.
Primary Applications of EN-GJS-600-3
The balanced combination of strength, ductility, and wear resistance makes EN-GJS-600-3 suitable for numerous demanding industrial applications.
Power Transmission Components
Crankshafts
Automotive and industrial engine crankshafts manufactured from EN-GJS-600-3 provide excellent fatigue resistance under cyclic loading. The material’s high strength supports combustion forces while the inherent damping capacity reduces vibration transmission through the powertrain. The complex geometry of crankshafts benefits from near-net-shape casting, minimizing expensive machining operations.
The material’s response to induction hardening or nitriding allows selective hardening of bearing journals while maintaining a tough core. This characteristic extends bearing life and reduces wear. Many medium-duty diesel engines and industrial power units utilize ductile iron crankshafts for their combination of performance and cost-effectiveness.
Gears and Sprockets
Gear applications benefit from EN-GJS-600-3’s wear resistance, damping properties, and casting versatility. Spur gears, helical gears, bevel gears, and worm gears can be cast with complex tooth profiles that would be expensive to machine from steel. The self-lubricating graphite structure reduces friction and extends gear life.
Surface hardening treatments enhance tooth surface durability for high-load applications. The tough core resists tooth breakage under shock loads. Industrial gearboxes, agricultural equipment, and construction machinery commonly employ ductile iron gears for reliable power transmission.
Camshafts
Engine camshafts require materials that combine wear-resistant lobes with adequate strength for bearing support. EN-GJS-600-3 provides natural lubricity for cam lobe contact surfaces. The casting process allows integration of multiple cam lobes and bearing journals in a single component.
Induction hardening of cam lobes creates wear-resistant surfaces exceeding 50 HRC while the shaft body remains tough and damage-tolerant. The material’s stability under thermal cycling makes it suitable for high-temperature engine environments.
Heavy Machinery Components
Hydraulic Cylinders
Hydraulic cylinder bodies cast from EN-GJS-600-3 offer excellent pressure containment combined with wear resistance. The high tensile strength safely contains pressures exceeding 250 bar in properly designed cylinders. The material’s dimensional stability prevents bore distortion under load.
The casting process creates complex internal porting and mounting features without extensive machining. Honing operations produce precision bores with excellent surface finish for seal and piston operation. Mobile equipment, industrial presses, and construction machinery utilize ductile iron hydraulic cylinders extensively.
Valve Bodies and Bonnets
High-pressure valve bodies for water, gas, and industrial process applications benefit from EN-GJS-600-3’s strength and corrosion resistance. The material safely contains internal pressure while resisting external environmental damage. Complex internal flow passages optimize fluid dynamics while minimizing turbulence and pressure drop.
Gate valves, globe valves, check valves, and control valves commonly utilize ductile iron bodies. The material’s impact resistance prevents damage during installation and service. Municipal water systems, industrial process plants, and oil and gas facilities rely on ductile iron valves for critical flow control.
Forging Dies and Tooling
Lower-stress forging dies and press tooling manufactured from EN-GJS-600-3 combine toughness with wear resistance. The material withstands repeated impact loading while maintaining dimensional accuracy. Surface hardening treatments enhance die face durability for extended production runs.
The cost-effectiveness compared to tool steels makes ductile iron attractive for moderate-production forging operations. Dies for agricultural implements, hand tools, and construction hardware commonly utilize heat-treated ductile iron.
Material Handling Equipment
Crane Wheels and Pulleys
Overhead crane wheels, gantry crane wheels, and various pulley applications require materials that combine high load capacity with rolling wear resistance. EN-GJS-600-3 provides the strength to support heavy suspended loads while resisting groove wear from cable or rail contact.
The damping properties reduce noise during operation and absorb impact loads when starting or stopping. Surface hardening of the tread extends service life in high-cycle applications. Ports, warehouses, and manufacturing facilities depend on ductile iron crane components for reliable material handling.
Cable Sheaves
Cable sheaves for elevators, mining hoists, and ship mooring systems utilize EN-GJS-600-3 for its wear resistance and strength. The spheroidal graphite provides natural lubrication for cable contact, reducing friction and heat generation. The material resists groove deformation under high cable tensions.
Large sheaves benefit from the casting process’s ability to create complex hub designs and mounting features. Surface hardening of the groove area enhances durability while the hub remains tough enough to resist impact damage.
Pump Components
Pump Housings and Volutes
Centrifugal pump casings manufactured from EN-GJS-600-3 provide excellent strength-to-weight ratio and corrosion resistance. The casting process creates complex internal flow passages that optimize hydraulic efficiency. The material withstands internal pressures while resisting erosion from suspended particles in pumped fluids.
Water supply pumps, wastewater pumps, slurry pumps, and chemical process pumps commonly utilize ductile iron housings. The material’s thermal conductivity helps dissipate heat generated by pump operation. Maintenance costs remain low due to the material’s durability and wear resistance.
Impellers and Rotors
Pump impellers benefit from EN-GJS-600-3’s wear resistance and balanced mechanical properties. The spheroidal graphite structure resists erosion from abrasive particles in pumped media. Complex vane geometries can be cast to optimize hydraulic performance without expensive machining.
The material’s strength supports high rotational speeds while resisting fatigue failure. Many municipal water pumps, industrial process pumps, and mining slurry pumps operate reliably with ductile iron impellers for decades of continuous service.
Note: Application selection should consider specific operating conditions including temperature range, corrosive exposure, loading patterns, and wear mechanisms. Consulting with experienced foundries helps optimize material selection and design.
Manufacturing Quality Considerations
Successful production of EN-GJS-600-3 components requires sophisticated metallurgical control and quality assurance systems. Professional foundries implement comprehensive procedures to ensure consistent material properties.
Melting and Treatment Process
Modern foundries typically produce EN-GJS-600-3 using electric induction furnaces that provide precise temperature and composition control. Base iron melts at approximately 1450-1500°C with careful monitoring of carbon and silicon levels. Desulfurization treatments reduce sulfur content below 0.015% to enable effective nodulization.
The nodulizing treatment introduces magnesium alloy (often containing rare earth elements) using sandwich, plunge, or tundish cover methods. Treatment parameters including magnesium addition rate, metal temperature, and holding time must be precisely controlled. Proper treatment creates spheroidal graphite with nodularity exceeding 80% and nodule count between 100-300 per square millimeter.
Following nodulization, inoculation with ferrosilicon or proprietary inoculants promotes uniform graphite nucleation and prevents carbide formation. Multiple inoculation stages (ladle, stream, and mold inoculation) optimize graphite structure throughout the casting.
Quality Control Testing
Chemical Analysis
Spectroscopic analysis verifies chemical composition before pouring each heat. Modern optical emission spectrometers provide rapid analysis of all major and minor elements. Results must fall within specification ranges before metal receives approval for pouring.
Metallographic Examination
Microscopic examination of polished and etched samples confirms graphite nodularity, nodule count, matrix structure, and absence of defects. Pearlite content must exceed 65% to meet specification requirements. Image analysis systems quantify these microstructural features objectively.
Mechanical Testing
Test bars cast separately or attached to production castings undergo tensile testing to verify strength, yield point, and elongation. Hardness measurements confirm expected values for the microstructure. Testing frequency follows established sampling plans based on production volume and customer requirements.
Dimensional Verification
Coordinate measuring machines and traditional inspection methods verify that castings meet dimensional tolerances. Critical features receive 100% inspection while other dimensions follow statistical sampling procedures.
| Quality Control Method | Parameters Verified | Testing Frequency | 
|---|---|---|
| Spectroscopic Analysis | C, Si, Mn, S, P, Mg, RE | Every heat | 
| Metallographic Exam | Nodularity, nodule count, matrix | Per production lot | 
| Tensile Testing | Strength, yield, elongation | Per specification requirements | 
| Hardness Testing | Brinell hardness | Per casting or lot | 
| Dimensional Inspection | Critical dimensions, tolerances | Based on sampling plan | 
| Ultrasonic Testing | Internal soundness | Critical applications | 
ISO/IATF 16949 Certification
Professional ductile iron casting foundries maintain ISO/IATF 16949 certification demonstrating commitment to quality management systems. This automotive-grade certification requires rigorous process control, continuous improvement, and comprehensive documentation. Certified foundries implement:
- Advanced Product Quality Planning (APQP) for new component development
- Production Part Approval Process (PPAP) documentation
- Statistical Process Control (SPC) for critical parameters
- Measurement System Analysis (MSA) to ensure measurement accuracy
- Failure Mode and Effects Analysis (FMEA) for risk mitigation
- Control plans defining inspection requirements and reaction plans
These systematic approaches ensure consistent production of components meeting customer specifications and performance requirements.
Tip: When sourcing EN-GJS-600-3 components, request evidence of quality system certification and review the foundry’s process control capabilities.
Selecting a Ductile Iron Casting Foundry
Component quality depends heavily on foundry expertise and manufacturing capabilities. Engineers should evaluate several factors when selecting a foundry partner.
Technical Capabilities Assessment
Metallurgical Expertise
Foundries specializing in ductile iron production demonstrate deep understanding of spheroidal graphite formation and matrix control. They maintain laboratory facilities equipped for chemical analysis, metallographic examination, and mechanical testing. Experienced metallurgists oversee production processes and troubleshoot quality issues. The foundry should provide detailed material certifications including chemical composition, mechanical properties, and microstructure verification.
Pattern Making and Tooling
Comprehensive pattern making capabilities enable rapid prototype development and production tooling fabrication. Modern foundries utilize CAD/CAM systems, CNC machining, and 3D printing for pattern production. The ability to recommend design modifications that improve castability and reduce costs demonstrates valuable engineering partnership.
Heat Treatment Facilities
On-site heat treatment equipment including stress relief furnaces, hardening systems, and surface treatment capabilities provides complete manufacturing solutions. Foundries should demonstrate knowledge of appropriate thermal cycles for EN-GJS-600-3 and ability to verify heat treatment results through hardness testing and metallographic examination.
Machining Services
Integrated machining capabilities allow delivery of finished components rather than rough castings. CNC machining centers, coordinate measuring equipment, and quality inspection systems support tight tolerance manufacturing. This integration simplifies supply chain management and improves delivery reliability.
Quality Management Verification
Professional foundries provide complete traceability from raw materials through final inspection. Each production lot receives unique identification enabling correlation with chemical analysis, mechanical test results, and production records. Material certificates document compliance with specifications and applicable standards.
Request sample castings demonstrating the foundry’s capability to produce your specific component. Examine the samples for surface quality, dimensional accuracy, and absence of casting defects. Review accompanying test reports confirming mechanical properties and microstructure characteristics. Consistent achievement of specified properties across multiple production lots indicates reliable process control.
Note: Foundries should willingly provide facility tours allowing direct observation of melting equipment, quality control laboratories, and production processes. Transparency indicates confidence in their capabilities.
Engineering Support Services
The best foundry partners offer collaborative engineering support throughout component development. They provide design for manufacturing guidance, helping optimize component geometry for improved castability and mechanical properties. Finite element analysis capabilities help predict stress distributions and identify potential failure modes. Prototyping services enable testing and validation before committing to production tooling.
Experienced foundries can recommend cost reduction opportunities through design modifications, material alternatives, or manufacturing process improvements. They understand the balance between performance requirements and manufacturing economics. This collaborative approach often yields superior results compared to simply producing components to submitted drawings.
Capacity and Delivery Performance
Evaluate the foundry’s production capacity relative to your volume requirements. Adequate capacity prevents delivery delays and maintains quality consistency. Review on-time delivery performance metrics and ability to respond to schedule changes. Established foundries maintain buffer capacity and backup plans to handle unexpected demand variations.
Geographic location affects transportation costs and lead times. Local or regional foundries may provide advantages for prototype development and technical support. However, qualified overseas foundries can deliver competitive pricing for larger production volumes when delivery schedules permit longer transit times.
| Evaluation Criteria | Key Indicators | Importance | 
|---|---|---|
| Metallurgical Expertise | Lab facilities, certified staff, test equipment | Critical | 
| Quality Systems | ISO/IATF certification, documented procedures | Critical | 
| Technical Capabilities | Pattern making, heat treatment, machining | High | 
| Engineering Support | Design assistance, FEA, prototyping | High | 
| Production Capacity | Equipment, volume capability, flexibility | Medium | 
| Delivery Performance | On-time metrics, responsiveness | Medium | 
| Cost Competitiveness | Pricing, payment terms, total cost | Medium | 
SHENGRONG Ductile Iron Casting Expertise
For engineers and manufacturers requiring high-quality EN-GJS-600-3 components, SHENGRONG delivers specialized expertise in ductile iron casting with comprehensive quality assurance. The foundry maintains ISO/IATF 16949 certification and operates advanced metallurgical laboratories ensuring consistent material properties. From initial design consultation through final inspection, SHENGRONG provides complete manufacturing solutions for demanding applications requiring reliable performance and exceptional quality standards.
Tip: Establish clear communication channels with your foundry partner. Regular technical discussions and joint problem-solving sessions create stronger relationships and better outcomes.
Design Considerations for EN-GJS-600-3 Components
Proper component design maximizes the advantages of ductile iron casting while avoiding common pitfalls that compromise performance or increase costs.
Wall Thickness Design
Uniform Section Thickness
Maintaining uniform wall thickness throughout the component promotes even cooling rates and consistent mechanical properties. Abrupt thickness changes create stress concentrations and increase defect risk. Gradual transitions between different section thicknesses minimize these problems. Design guidelines recommend transition ratios not exceeding 1:1.5 for thickness changes.
Uniform sections also improve casting yield by reducing material usage. Solidification proceeds predictably, minimizing shrinkage defects and internal porosity. The consistent microstructure throughout the component ensures reliable performance under service loads.
Section Thickness Selection
Select section thickness based on strength requirements and desired mechanical properties. Thinner sections (below 30mm) deliver maximum strength and hardness but may increase casting difficulty. Medium sections (30-60mm) balance good properties with easier production. Heavy sections (over 60mm) accept lower mechanical values but accommodate high loads through increased cross-sectional area.
Avoid unnecessarily thick sections that waste material and reduce mechanical properties. Ribbing and structural features can provide stiffness and strength more efficiently than simply increasing wall thickness. Finite element analysis helps optimize section sizing for specific loading conditions.
Stress Concentration Management
Fillet Radii
Generous fillet radii at internal corners reduce stress concentrations and improve fatigue life. Minimum fillet radius should equal wall thickness or 5mm, whichever is greater. Larger radii provide additional benefits without significantly increasing casting difficulty. Sharp internal corners create stress risers that initiate crack formation under cyclic loading.
External corners benefit from radii as well, improving casting quality by promoting smooth metal flow during mold filling. Radiused corners resist damage during handling and installation compared to sharp edges.
Hole and Opening Design
Holes and openings create stress concentrations requiring careful design attention. Position holes away from high-stress regions when possible. Maintain adequate material between holes and component edges. Reinforce hole perimeters with thickened sections or bosses when loads concentrate at these locations.
Avoid placing holes at section thickness transitions where stress concentrations already exist. Cast holes rather than machining when possible, as the casting process creates favorable grain flow around the opening.
Casting Process Considerations
Draft Angles
Provide adequate draft angles (typically 1-3 degrees) on surfaces perpendicular to the parting line. Draft enables pattern removal from molds without damage. Insufficient draft damages molds and may create surface defects on castings. Deeper pockets and cores require larger draft angles.
Parting Line Location
Work with your foundry to select optimal parting line locations. Proper placement minimizes machining requirements, reduces casting complexity, and improves surface quality. Parting lines should bisect the component at its maximum dimensions when possible. Avoid parting lines intersecting critical machined surfaces.
Coring and Undercuts
Complex internal features require cores that increase casting cost and complexity. Design components with internal passages accessible for core placement and removal. Minimize the number of cores required through thoughtful geometry design. Consider whether machining internal features might be more economical than casting them for low-volume production.
Undercuts prevent pattern removal and should be avoided unless absolutely necessary. When unavoidable, discuss alternative manufacturing approaches with your foundry including split patterns, loose pieces, or machining the undercut feature.
Machining Allowances
Provide adequate machining stock (typically 2-5mm) on surfaces requiring precise dimensions or good surface finish. As-cast surfaces exhibit roughness and dimensional variation from the casting process. Critical mating surfaces, bearing bores, and mounting faces require machining to achieve necessary accuracy.
Minimize machining requirements to reduce cost and preserve casting advantages. Many surfaces can remain as-cast for applications where precise dimensions or smooth finish are not required. The natural as-cast surface provides excellent corrosion resistance due to graphite exposure.
Tip: Involve your foundry partner early in the design process. Their expertise helps optimize component design for manufacturing efficiency and performance.
Cost-Effectiveness of EN-GJS-600-3
Understanding the economic advantages helps engineers justify material selection and optimize manufacturing approaches.
Material and Manufacturing Economics
Near-Net-Shape Casting
The casting process creates complex geometries approaching final dimensions, minimizing expensive machining operations. Components with intricate internal passages, multiple mounting features, and integrated structural elements demonstrate maximum cost advantages. Material utilization efficiency exceeds 85% for well-designed castings, compared to 40-60% for machined components starting from bar stock or forgings.
The ability to cast integral features eliminates assembly operations and associated fastening costs. Mounting bosses, ribs, pockets, and ports become part of the basic casting rather than separate pieces requiring joining. This integration reduces part count, simplifies inventory management, and improves reliability by eliminating potential assembly failures.
Tooling Investment Recovery
Pattern and tooling costs represent upfront investment that amortizes across production volume. Break-even analysis typically shows casting becomes economical at volumes exceeding 50-100 pieces for complex components. Higher volumes drive per-piece costs significantly below alternative manufacturing methods.
For prototype and low-volume applications, rapid tooling methods including 3D-printed patterns reduce initial investment. These approaches enable economical short-run production while providing flexibility for design iterations.
Performance-Based Value
Extended Service Life
The wear resistance and fatigue strength of EN-GJS-600-3 components often deliver service life exceeding steel alternatives. Reduced replacement frequency lowers total cost of ownership despite potentially higher initial component cost. The material’s damping capacity protects associated components from vibration damage, extending system-level reliability.
Applications in demanding environments demonstrate particular value. Corrosion resistance in water and mild chemical environments reduces coating requirements. Temperature stability maintains properties across wide operating ranges. These performance characteristics translate directly to reduced maintenance costs and improved equipment availability.
Design Optimization Opportunities
The favorable strength-to-weight ratio enables component weight reduction compared to lower-strength materials. Lighter components reduce shipping costs, simplify handling, and decrease loads on supporting structures. The design flexibility of casting allows topology optimization creating efficient load paths with minimal material usage.
Integration of multiple functions into single castings eliminates assembly costs and potential failure points. These consolidated designs often demonstrate superior performance while reducing total system costs.
| Cost Factor | EN-GJS-600-3 Advantage | Impact Level | 
|---|---|---|
| Material Utilization | 85%+ efficiency vs 40-60% for machining | High | 
| Manufacturing Complexity | Cast complex geometry economically | High | 
| Part Integration | Eliminate assemblies and fasteners | Medium to High | 
| Service Life | Extended wear and fatigue life | Medium to High | 
| Machining Time | Reduced finishing operations | Medium | 
| Weight Reduction | Lower shipping and handling costs | Low to Medium | 
Note: Conduct total cost of ownership analysis considering initial cost, service life, maintenance requirements, and system-level effects when comparing materials and manufacturing methods.
Common Applications by Industry
EN-GJS-600-3 serves diverse industries requiring reliable performance in demanding conditions.
Automotive Industry
Engine components including crankshafts, camshafts, and connecting rods for medium-duty applications. Suspension parts such as control arms, knuckles, and wheel hubs requiring fatigue resistance. Brake system components including calipers, drums, and backing plates benefiting from thermal conductivity and wear resistance.
Agricultural Equipment
Gear housings and transmission components for tractors and combines. Implement frames and structural components requiring impact resistance. Hydraulic system components including cylinder bodies and valve manifolds. Wear plates and tillage tool mounting hardware subjected to abrasive soil contact.
Construction Machinery
Hydraulic excavator components including cylinder bodies, valve blocks, and pump housings. Crane wheels, sheaves, and lifting attachments requiring high load capacity. Tracked equipment components such as idlers, rollers, and drive sprockets. Concrete mixer components including drums, mixing paddles, and discharge chutes.
Industrial Machinery
Machine tool components including bases, columns, and structural elements utilizing vibration damping. Gear reducers and speed increaser housings for power transmission. Press frames and bolsters requiring rigidity and impact resistance. Conveyor system components including sprockets, pulleys, and support brackets.
Municipal Infrastructure
Water distribution valves and fittings from 50mm to 1200mm diameter. Fire hydrants and underground valve boxes requiring corrosion resistance. Wastewater pump components including housings, impellers, and discharge flanges. Manhole covers, grates, and frames bearing traffic loads.
Mining and Material Processing
Crusher components including frames, jaws, and wear plates. Grinding mill liners and structural elements. Slurry pump housings and impellers handling abrasive materials. Conveyor components transporting ore and bulk materials.
Tip: Industry-specific experience with EN-GJS-600-3 applications helps foundries anticipate requirements and recommend proven solutions. Select partners with relevant sector expertise.
Inspection and Testing Protocols
Comprehensive inspection ensures components meet specifications and perform reliably in service.
Dimensional Inspection
Coordinate measuring machines verify critical dimensions including hole locations, mounting surfaces, and interface features. Traditional inspection tools including calipers, micrometers, and gauge pins check routine dimensions. Statistical process control tracks dimensional trends identifying process variations requiring correction before producing nonconforming parts.
Functional gauging verifies that components fit properly with mating parts. Go/no-go gauges provide rapid verification of critical features. First article inspections thoroughly document all dimensions before approving production runs.
Surface Quality Assessment
Visual inspection identifies surface defects including cracks, cold laps, sand inclusions, and metal penetration. Trained inspectors recognize cosmetic defects versus conditions affecting performance. Surface roughness measurements verify machined surfaces meet specifications for bearing contact, sealing surfaces, and assembly interfaces.
Magnetic particle inspection or liquid penetrant testing detects surface-breaking cracks and defects on critical components. These non-destructive methods provide confidence in surface integrity without damaging parts.
Internal Soundness Verification
Ultrasonic testing detects internal porosity, shrinkage, and inclusions in critical castings. Trained technicians interpret signal patterns identifying defect size and location. Radiographic inspection provides visual evidence of internal conditions but requires specialized facilities and safety precautions.
Destructive testing of sample castings cut from production lots verifies internal quality. Metallographic examination of polished cross-sections reveals porosity, inclusions, and microstructure characteristics.
Mechanical Property Validation
Tensile testing of separately cast test bars or bars attached to production castings verifies strength, yield point, and elongation. Testing frequency follows specification requirements, typically ranging from per-heat testing to periodic sampling. Hardness testing provides rapid verification of expected properties correlating with tensile strength.
Impact testing determines material toughness when specified for critical applications. Charpy or Izod tests measure energy absorption during fracture under controlled conditions.
| Inspection Method | Purpose | Application | 
|---|---|---|
| Dimensional CMM | Verify critical dimensions and tolerances | Complex geometry, tight tolerances | 
| Visual Inspection | Detect surface defects | All castings | 
| Magnetic Particle | Find surface cracks | Critical safety components | 
| Ultrasonic Testing | Detect internal defects | Heavy sections, critical loads | 
| Tensile Testing | Verify mechanical properties | Specification requirements | 
| Hardness Testing | Rapid property verification | Production monitoring | 
| Metallographic Exam | Confirm microstructure | Quality validation | 
Note: Testing frequency and methods should match component criticality and application requirements. Consult specifications and customer requirements when developing inspection plans.
Troubleshooting Common Issues
Understanding potential problems helps engineers and foundries achieve optimal results.
Low Mechanical Properties
Cause: Insufficient nodularity due to inadequate magnesium treatment, high sulfur content, or fading (loss of magnesium effectiveness over time).
Solution: Verify chemical analysis especially residual magnesium and sulfur. Check treatment parameters and pouring time after treatment. Increase magnesium addition or improve desulfurization if necessary.
Cause: Excessive ferrite in matrix reducing strength.
Solution: Adjust silicon and manganese content. Modify cooling rate through section design or mold material. Consider normalization heat treatment to convert ferrite to pearlite.
Casting Defects
Shrinkage Porosity: Results from insufficient feeding during solidification. Improve feeding system design with adequate risers. Modify section thickness transitions promoting directional solidification. Increase pouring temperature moderately to extend feeding time.
Gas Porosity: Caused by hydrogen, nitrogen, or steam trapped during solidification. Improve mold venting. Ensure raw materials are dry and free from contamination. Degas molten metal if necessary. Reduce pouring turbulence.
Sand Inclusions: Occur when mold material erodes and becomes trapped in casting. Improve mold strength through better sand bonding. Reduce pouring velocity. Design gating systems minimizing metal impact on mold surfaces.
Machining Difficulties
Excessive Tool Wear: May indicate higher-than-expected hardness or presence of carbides.
Solution: Verify hardness is within specification range. Check for white iron or carbides in microstructure. Adjust cutting parameters including speed, feed, and depth of cut. Use appropriate tooling including carbide inserts for hard materials.
Poor Surface Finish: Can result from incorrect cutting parameters, dull tools, or material inconsistency.
Solution: Optimize cutting speed and feed rate for material hardness. Replace worn cutting tools. Verify coolant application and concentration. Check for material hardness variation.
Tip: Maintain open communication between design, foundry, and machining teams. Early identification of issues enables faster resolution and prevents costly production delays.
Conclusion
EN-GJS-600-3 ductile iron delivers exceptional performance for demanding engineering applications requiring high strength, excellent wear resistance, and reliable service life. Engineers who understand the material’s chemical composition, mechanical properties, and international equivalents can optimize component design and material selection for superior results.
The carefully controlled chemical composition creates the spheroidal graphite microstructure distinguishing this material from conventional cast irons. Proper nodulization produces graphite spheres that enhance ductility while maintaining high strength. The predominantly pearlitic matrix delivers wear resistance and hardness suitable for harsh operating environments. Material properties vary with section thickness, requiring thoughtful design consideration for components with variable wall dimensions.
Knowledge of equivalent international grades facilitates global sourcing and ensures material compatibility across multinational projects. Whether specified as EN-GJS-600-3, GGG-60, ISO 1083/JS/600-3, or similar designations, the fundamental material characteristics remain consistent. This standardization supports reliable component performance regardless of manufacturing location.
Applications spanning automotive powertrains, industrial machinery, municipal infrastructure, and material handling equipment demonstrate the material’s versatility and proven reliability. The combination of favorable mechanical properties, excellent casting characteristics, and cost-effective manufacturing makes EN-GJS-600-3 an intelligent choice for engineers seeking optimized solutions.
Success with EN-GJS-600-3 components depends significantly on partnering with experienced ductile iron casting foundries maintaining rigorous quality control and providing strong engineering support. Professional foundries with ISO/IATF 16949 certification demonstrate commitment to consistent quality and continuous improvement. Their metallurgical expertise, advanced testing capabilities, and collaborative engineering services help transform design concepts into reliable production components.
For projects requiring high-quality EN-GJS-600-3 castings, selecting the right foundry partner ensures optimal results and long-term reliability.
FAQ
What makes EN-GJS-600-3 different from regular cast iron?
EN-GJS-600-3 contains spheroidal graphite nodules rather than graphite flakes found in gray iron. This microstructure provides significantly higher strength, ductility, and impact resistance. The material delivers minimum 600 MPa tensile strength compared to 150-300 MPa typical for gray iron. The spheroidal structure also improves fatigue resistance and damage tolerance.
How does section thickness affect EN-GJS-600-3 properties?
Cooling rate varies with section thickness, affecting final microstructure and EN-GJS-600-3 material properties. Thin sections (under 30mm) cool quickly, producing fine pearlite and maximum strength. Heavy sections (over 60mm) cool slowly, resulting in coarser structure with somewhat reduced mechanical values. Engineers must account for these EN-GJS-600-3 material properties variations when designing components with variable wall thickness.
Can EN-GJS-600-3 be welded?
Ductile iron can be welded using appropriate procedures and filler materials. Preheating to 200-300°C reduces thermal shock and prevents cracking. Nickel-based filler metals provide best results for structural repairs. Post-weld heat treatment helps stress relief and property restoration. However, welding remains challenging and should be avoided through proper design when possible.
What heat treatments improve EN-GJS-600-3 performance?
Normalization refines microstructure and improves toughness. Hardening and tempering significantly increases strength for high-stress applications. Surface treatments including induction hardening, flame hardening, and nitriding create wear-resistant surfaces while maintaining tough cores. Selection depends on specific performance requirements.
How does EN-GJS-600-3 compare to steel for component cost?
Initial casting costs may exceed steel fabrication for simple components. However, complex geometries with integral features demonstrate significant cost advantages. Near-net-shape casting minimizes machining compared to steel. Extended service life and reduced maintenance often result in lower total cost of ownership despite higher initial expense.
What surface treatments protect EN-GJS-600-3 from corrosion?
Paint systems provide economical corrosion protection for most environments. Powder coating delivers durable, attractive finishes. Electroplating with zinc, nickel, or chrome offers enhanced protection. Epoxy and polyurethane coatings work well for water and chemical exposure. The natural as-cast surface exhibits moderate corrosion resistance in many applications.
Why should engineers specify foundries with ISO/IATF 16949 certification?
This certification demonstrates rigorous quality management systems with documented procedures and continuous improvement practices. Certified foundries implement statistical process control, failure mode analysis, and comprehensive testing protocols. The systematic approach ensures consistent component quality and reduces risk of defects or performance failures.
Tip: For complex or critical applications, request Design Failure Mode and Effects Analysis (DFMEA) collaboration with your foundry partner to identify and mitigate potential issues before production begins.